Pages

Wednesday, December 11, 2013

34 Before 34 List

Fortune
So this week I was invited to a "Favorite Things" party with some old college friends. I had never heard of a Favorite Things party before so as the host was describing where she came up with the idea she talked about the fact that it was on her "30 things to do before I turn 30" list. Later in the evening she shared the rest of the list with us. I was inspired!
I recently celebrated my 33rd birthday. I'm a list maker and a goal-oriented gal myself so I thought, maybe she's on to something here, so I started brainstorming.
Here's what I came up with... in no particular order:
  1. Run my second half marathon
  2. Watch It's a Wonderful Life
  3. Write my will
  4. Make a big change
  5. Get in a blog network
  6. Try a linking party
  7. Attend a conference
  8. Sew a maxi skirt
  9. Make a piece of jewelry
  10. Lose 34 pounds
  11. Finish the baby books
  12. Make myself an apron
  13. Update the family photos around the house
  14. Develop a collection of greeting cards for birthdays, anniversaries and just because. Send them.
  15. Take Curly Girl to a show and make it a special date night
  16. Make a cheesecake from scratch
  17. Start the girls' savings accounts
  18. Buy something from Zulilly
  19. Finish a 30 day fitness challenge
  20. Reorganize our perennial garden
  21. Become a person who makes my bed every day {ok, most days}
  22. Do a 3 day juice fast
  23. Have a weekend get-a-way with Carl
  24. Read something awesome
  25. Taking a relaxing vacation (...like without an itinerary)
  26. Explore Bemidji, Minnesota
  27. Write a really personal blog post about something that matters
  28. Go to West Fargo's Bonanzaville
  29. Take the girls to a big zoo
  30. Start wearing jackets
  31. Tube the Ottertail River
  32. Golf 18 holes and enjoy it
  33. Bike the Wilderness Trail at Itasca
  34. Host a themed party
There you have it! To keep myself accountable, I'll check in time to time to give an update!

Happy list-making ya'll! Tell me what you would be on your list!

-Nina

Saturday, November 23, 2013

Sunshine and Rainbows Cupcakes


My Curly Girl is three!

So being the DIY mom I am, I just had to come up with a cute cupcake decoration to send to daycare with my girly!

Sunshine cupcakes made with yellow frosting, candy corn rays, M&M eyes and a gel frosting mouth.

Rainbow cupcakes made with blue frosting, "Brite Crawler" gummy worm rainbow and marshmallow clouds.

Big hit with the toddlers, I tell you! The most fun part was hearing Curly Girl recant what each kid chose. "Jack chose suns. He likes 'lello'. Trina had an airplane..." (Which must have been what the rainbows became.)

Homemade frosting? Of course! Why go for that canned stuff when making homemade is as easy as 1-2-3!

Quick & Easy Buttercream Frosting
1 cup butter, room temperature
1 teaspoon vanilla
2 tablespoons milk or whipping cream
3 cups powdered sugar

Whip the ingredients together until light and fluffy. Adjust ingredients as needed (more sugar for stiffness, more milk for fluffiness). Drop in food coloring a few drops at a time until you reach desired color, if needed. 

Happy birthday, my girl! You bring me sunshine and rainbows and everything lovely to my life each day!

Tuesday, November 12, 2013

Homemade Chicken Stock


Want your chicken soup to have true healing powers? There is nothing. Nothing. Better than homemade chicken stock. ...ok, so maybe that's a little dramatic. There are better things in life... But if you pride yourself as a decent cook, this is definitely a bucket list item. The great thing? It really doesn't even take that much effort. It mostly just takes a really big pot.

We've tried a few different stock recipes and it is certainly something that you can customize according to your own flavor preferences but for us, Ina Garten has it down.

Homemade Chicken Stock
recipe from Ina Garten
click above for my easy print google doc

Ingredients


3 (5-pound) roasting chickens
3 large yellow onions, unpeeled and quartered
6 carrots, unpeeled and halved
4 stalks celery with leaves, cut into thirds
4 parsnips, unpeeled and cut in half, optional
20 sprigs fresh parsley
15 sprigs fresh thyme
20 sprigs fresh dill
1 head garlic, unpeeled and cut in 1/2 crosswise
2 tablespoons kosher salt
2 teaspoons whole black peppercorns

Directions

Place the chickens, onions, carrots, celery, parsnips, parsley, thyme, dill, garlic, and seasonings in a 16 to 20-quart stockpot. Add 7 quarts of water (or enough to cover everything) and bring to a boil. Simmer, uncovered, for 4 hours. After an hour of simmering, you can remove the chickens and remove the meat from the bones to use in other recipes (like chicken soup!). Return the bones back to pot for the remaining three hours. Strain the entire contents of the pot through a colander and discard the solids. Chill the stock overnight. The next day, remove the surface fat. Use immediately or pack in containers and freeze for up to 3 months.

Did your stock get a little jelly overnight? Pat yourself on the back! That means you've got a super rich stock! I know I freaked out the first time I ran into that. It's not fat. Collagen in the bones gets drawn out the longer you let it simmer. 


Wednesday, November 6, 2013

my photography homework


So I work in higher education. One of the many benefits of my job (outside of working with amazing, optomistic "I'm going to change the world" college students) is that I get a tuition waiver so I get to take classes from talented faculty. for. free. 

So this fall I decided I should take some classes for "fun" so I'm taking two classes from our Mass Communications department--one in social media and the other in photography.

I think I'm actually getting somewhere in my photography class so I thought I'd share my homework with you. In this week's assignment, we've started working with photo editing so we were tasked with some black and white photography and "high key" and "low key" backgrounds. 


above-my perfect little Curly Girl in a "Rembrandt" style portrait. To do this, I just hung a black bed sheet over my dining room curtains and left the east side window curtains open for side lighting. I underexposed the photo just a bit to make the black background rich. 

Second, birthday flowers from my husband made for a nice subject with both a white and black background. I used a low f-stop on the first to create a small depth of field for that blurry background

Last, a beautiful little Mary statue I found in an antique store this summer. 

Returning to "college" has certainly been an experience. I LOVE learning so it's been fun to be back in the classroom but certainly awkward too. My photography class is online but my social media class is in person. I have to admit I feel like a nervous ninny my first day of class, being that "old" person (especially in a social media class!)... but hey, just like this delicious quote from Brian Tracy:


Sometimes you have to get a little uncomfortable to grow, right?

-Nina


Monday, November 4, 2013

Perfect Roast Chicken


The perfect roast chicken. There is nothing more classic. I've made more than a few in my days but I just keep coming back to this recipe from one of my Food Network faves Ina Garten. No one does classic like she does. 

I love her combination of vegetables in this one, particularly the fennel. It might be silly but this vegetable was literally on my bucket list of ingredients to use. I LOVE roasted vegetables and roasted fennel in this recipe turned out sweet with a hint of licorice and was delish. You can also toss in brussel sprouts or potatoes or parsnips if you want to change it up. 

Perfect Roast Chicken
click above for an easy print google doc

Ingredients:
1 roasting chicken (5-6lbs)
Kosher salt
Freshly ground black pepper
1 large bunch of fresh thyme
1 lemon, halved
1 head of garlic, cut in half crosswise
2 TB butter, softened
1 large yellow onion, thickly sliced
4 carrots cut into 2-inch chunks
1-2 bulbs of fennel, tops removed and cut into wedges through the root
Olive oil

Directions:

Prepare the vegetables and place in the bottom of a roasting pan covered in aluminum foil. (I love roasting but it can create a sticky mess so be sure to take a minute to cover the pan.) Toss with salt, pepper, 20 or so sprigs of thyme and olive oil. Spread around the pan to create a roasting rack for the chicken.

Prepare the chicken by removing giblets and giving it a good rinse inside and out, removing excess fat or pinfeathers. Use a paper towel to pat the outside dry. Liberally salt and pepper the inside cavity. Stuff the cavity with a handful of thyme, half of the lemon and the split head of garlic. Close it off with the other half of the lemon. Rub the outside of the chicken with butter. (If you want to be neat about this, you can melt it and brush it like Ina but I like to give the chicken a good rub down.) Liberally salt and pepper the outside of the chicken with salt and pepper. Tie the legs together with kitchen string and tuck the wings under the body of the chicken.

Place the chicken on top of the vegetables. Roast the chicken for about 90 minutes or until the juices run clear when you poke it between a leg and thigh or a meat thermometer reaches 160 degrees.


My veggies all chopped up and ready for roasting. 
You can see I did toss in some brussel sprouts this round.  

The chicken all rubbed down and ready to be cooked. 

Done! with a little lemon poking out of the back. 

This can even been a great "prep ahead" meal. For my make ahead meal schedule, I've put this all together on Sunday night and covered the roasting pan with aluminium foil The night day I plan to serve it, I pop it in the oven before I head to work and set the delay start on my oven so that it's just about done when I get home with the girlies. I've also bought double the recipe and pre-prepped extra veggies and the cavity stuffing to put in the freezer for future cooking.


Happy cooking!

-Nina

Friday, November 1, 2013

Pumpkin Curry


One of my absolutely favorite fall traditions is making pumpkin curry. We discovered this three years ago when we first joined our CSA farm and received a half dozen pumpkins during the fall season. Outside of make pies and treats, we had no idea what to do with them! So we searched for some savory recipes and discovered the idea of pumpkin curry. We've played around with recipes and settled on these ingredients. 

We loooooove international cuisine, particularly Thai.  Once upon a time we lived in Minneapolis and had a ton of restaurants at our fingertips so we could be picky little food snobs who would go to one place for curry and another for noodles and another for stir fry. Now that we live in Fargo, that level of selection isn't available to us anymore so we've been forced into the kitchen to experiment and concoct the flavor profiles that we really love. 

If you love creamy, sweet, spicy Thai curry, this recipe is for you! With just a few simple ingredients you can really taste each thing. If you haven't experimented with international cuisine, this is an easy one to start with. 

click above for a link to my easy print google doc

Ingredients:
         1-14oz can coconut milk
         2 TB red curry paste
         1 lb fresh sweet pumpkin, peeled, seeded and cubed
         1 chili pepper (jalapeño is great for this)
         4-5 kaffir lime leaves (try your local Asian market for these)
         7-8 thai basil leaves
         1 cup chicken or vegetable stock
         salt, to taste
         1 cup shredded chicken, optional

Directions:
Prepare pumpkin by peeling and removing seeds. Cut into about 1 1/2 inch cubes. Some small and big is good. The smaller cubes will dissolve to thicken the curry. Julienne the pepper. Tear the center stem from the kaffir lime leaves and julienne the Thai basil.

Pour half of the coconut milk into a pot over medium heat. Add the red curry paste and mix it well with coconut milk. Stir to prevent the bottom from sticking and burning. Simmer until a reddish oil ring starts to form, then stir to let the oil bring out the flavor and aroma in the spices.

Add the pumpkin and stir to coat pumpkin with curry sauce. Add the rest of coconut milk and stock. Season with salt; start with a teaspoon and taste. Prepared curry paste can vary in salt content so increase salt to taste. Simmer until the pumpkin is soft, about 25 minutes.

Add sliced pepper and kaffir lime leaves. Add Thai basil. Turn off the heat and allow to cool slightly and combine flavors.

This is a great make ahead or freezer meal as the flavors will increase as it rests.


A handful of relatively simple ingredients


Prepare pumpkin by cutting into about 1 1/2 inch cubes

Julienne basil and pepper. Tear lime leaves from step and tear or chop into smaller pieces

Let coconut milk and curry paste simmer to bring the oil out

Add pumpkin and stir to coat pumpkin in curry. Add the other half of the coconut milk and stock. Simmer until pumpkin is tender and smaller pieces break apart to thicken the curry. Add salt to taste. If you want a slightly sweeter curry, you could also add in a tablespoon or two of brown sugar. 

At the last minute, add the pepper, basil and lime leaves. You can also stir in some precooked chicken at this point if you want to add a protein to the dish.

There it is! Yummy sweet, spicy pumpkin curry.

Happy cooking!

-Nina


Wednesday, October 30, 2013

Cloth Baby Shoe Tutorial


It was just about a year ago that my maternity leave with GiGi was coming to a close and I decided to take a few delicious days to myself as GiGi started daycare and I prepared to return to work. In those three days, I bought a new sewing machine to replace the $100 Walmart Singer machine that finally gave in and I determined that I would start a blog to help give me the motivation to use it.

Wow. 

What an awesome year it's been. We expanded our family and welcomed GiGi and family life could not be better with her in it. Having two babies in less than two years has certainly been a challenge but a wonderful one! 

...and I started a blog! My sewing has gone from a minor activity I did every now and then to something that has become a part of my identity. I am by NO means an expert and it still makes me laugh a little inside when people come to me for sewing advice because I see myself as a beginner. However, I've been able to challenge myself in some new ways and completed projects I don't think I would have attempted without my blog to motivate me.

But enough musing, let's get to the good stuff!

I started my blog with three posts dedicated to three of my very favorite projects, what I call my "Favorite DIY Baby Gift". To this day, those are still my top posts and one in particularly, my cloth baby shoes, has shot to the moon with nearly 10,000 page views. It wasn't really my favorite post because it was just pictures of cute shoes I made without a real tutorial so it's nagged me all year that I should honor the post by creating a real tutorial. Here it is! 

thatssewnina's cloth baby shoe tutorial & free pattern
Click above for a link to my google docs


Supplies Needed:

  • A scrap of a sturdy fabric--an 8x10ish scrap is about all you need (I like to use coordinating flannel if I'm making a full baby gift. I've also used home dec fabric. Cotton quilting fabric is okay too but not as thick and sturdy.)
  • A scrap of fabric for the interior lining of the shoe. (you could just use your same flannel here)
  • Fusible web (e.g. wonder under)
  • Two 8" lengths of 1/8" elastic
  • Matching thread
  • A sewing machine

Here's how I created my own pattern--and how you can too! 


 I started with a pair of cloth shoes I wanted to copy.


 I turned the shoe inside out and ripped the seams apart. 

Here were the three pieces that made the shoe. 
That's not so intimidating, right?  


I traced the pieces on paper. 


Using a see-thru ruler, I traced a 1/4" gap around the outside of each piece to account for seam allowances.


Here they are! Ready to be cut out.


Pattern, check! Now ready to create my tutorial.

Check out my google doc for the details but here's a little preview of some of the steps. It's easier than it looks--especially if an addiction is born and you find yourself making shoes with every spare scrap of fabric you have. 


Post update: I've received a few questions about sizing. My pattern will result in a shoe with a 4" sole. To adjust it, just photo copy the pattern and increase it by 10% for each size up you want to go (or adjust settings on your printer to print larger). There are a lot of sizing charts out there but adjusting the sole by 1/2 inch seems to be pretty standard:

0-3 months = 3.5" sole
3-6 months = 4" sole
6-9 months = 4.5" sole
9-12 months =5" sole
12-18 months = 5.5" sole

Happy sewing!

-Nina


Wednesday, September 11, 2013

"Elvis" Cupcakes: Peanut Butter & Banana


Recently I was invited to a potluck cook out at my church so I used it as an excuse to come up with something pretty to make. We had collected just a ton of overripe bananas  in our freezer so I thought it might be time to use some up. Most of my banana recipes are breakfast oriented so I thought I'd try my hand at some cupcakes. Immediately the idea of "Elvis" cupcakes came to mind combining banana cake with peanut butter frosting. 
Funny story? So I bring said cupcakes to the cook out with the label "Elvis Cupcakes" describing them as banana cake with peanut butter frosting and I had at least three people ask me what that had to do with Elvis (maybe you're wondering the same thing). I was shocked! I thought Elvis' love of fried peanut butter & banana sandwiches was common knowledge... but perhaps Elvis has lost his grip on pop culture trivia. Learn more about Elvis' love of fatty foods in this great NPR story or watch this super awkward Elvis impersonator making his own version. 

Anyway! Here goes the recipe. 

Elvis Peanut Butter & Banana Cupcakes
click above for an easy print version

Ingredients:
For the cupcake from ilovepeanutbutter.com
very ripe banana
1 teaspoon lemon juice
whole eggs
1 cup plus 2 tablespoons cake flour
½ cup sugar
2 teaspoons baking powder
¼ teaspoon kosher salt
6 tablespoons very soft, unsalted butter


For the icing:
1 cup powdered sugar
1 cup creamy peanut butter
5 tablespoons unsalted butter, at room temperature
3/4 teaspoon pure vanilla extract
1/4 teaspoon kosher salt
1/3 cup whipping cream 


For the butter-fried breadcrumbs (if you're feeling fancy):
2 tablespoons unsalted butter
¼ cup panko bread crumbs

1 tablespoon sugar
pinch of salt


Directions: 


Preheat the oven to 350°F and line a muffin pan with cupcake liners.
Mash together the banana and lemon juice until smooth, then whisk in the eggs. In another bowl, use a fork to whisk together the cake flour, sugar, baking powder and salt. Beat in the butter until well incorporated. Add the banana and egg mixture and mix until just combined.

Fill the cupcake liners 2/3 full with batter. Bake for 15-20 minutes until a toothpick inserted in the cake comes out clean. Be careful not to overbake so that your cupcakes don't come out dry. 

Allow to cool completely and pipe on the icing. 

For the icing, combine the powdered sugar, peanut butter, butter, vanilla, and salt. Mix on medium-low speed until creamy, scraping down the bowl with a rubber spatula as you work. Add the cream and beat on high speed until the mixture is light and smooth. 

If you're feeling fancy, take a few minutes to fry some panko breadcrumbs with butter and a bit of sugar and a pinch of salt to sprinkle over the top. Be sure to let them cool before sprinkling on your cupcakes. 


Beautiful and delicious!

Boy that Elvis had something going. Now you can share a little Elvis history with your friends. 


curly girl thinks you should eat one

Sunday, September 8, 2013

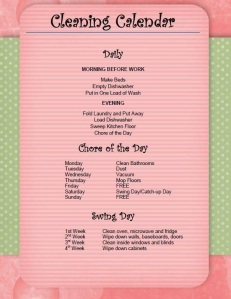
Getting Organized: a Cleaning Calendar


We’re a busy family. Two kiddos under three and two working parents makes life challenging to manage day-to-day. My husband and I are neat and tidy folks with type-A personalities so we both get a little edgy when the chores pile up.

IMG_0907
My husband came across this great image of a cleaning calendar from the blog bakerette.com when he was searching for ideas on how to get more organized with household chores. This calendar was such a great idea, but I wanted to create one for myself that I could update with chores that better fit our lives. Now I want to share an editable version with you!
Click on the link above to download my google doc. To edit the chores in the text boxes, just click on the text and start typing! I used “Apple Casual” for the font to match the headings I created so depending on the fonts available to you, your download might look a little different. Isn’t that the great thing about being able to edit it? If you like what we’re up to and don’t need to change the chores, feel free to just save my image.
Happy cleaning!
Like this? Maybe you’d be interested in a freezer inventory too. This was another great pinterest find that I made my own. I use it to keep track of all of the proteins, veggies and pre-made meals stored in my freezer.  If you laminate it, you can use a dry-erase marker to mark the checkboxes on the left with one slash to indicate the number of an item in the freezer (like three boxes slashed for three pounds of ground beef) then I complete the X once the item has been used.

Thursday, September 5, 2013

Better Than (you know what) Cake


Earlier this month we traveled home and had a little birthday celebration for my GiGi and my wonderful sister-in-law. I offered to make the dessert and asked my SIL what she might like and she said, "You what would be good..." and this was the result! 

Having eaten this cake a bazillion times at potlucks and at my favorite downtown Fargo lunch spot the VIP room (they call it BTS cake, which cracks me up!), I am surprised I've never made it or had much thought about what actually went into delicious treat. It's surprisingly simple! 

Here's how:

Better than Sex Cake

Ingredients:
1-chocolate cake mix and supplies
1-14-oz. can of sweetened condensed milk
1-12oz. jar of caramel ice cream topping (the thick stuff!)
8 oz. of whipped cream or cool whip 
1 cup of chopped Butterfinger or Heath bars (2-3 bars should do it)

Directions:
Take note (because I didn't!) that this cake should be made a day ahead for maximum "sexiness". 

Make the chocolate cake mix as directed on the box (or make a homemade chocolate cake if you're fancy.) Using the end of a wooden spoon (or whatever you have handy), poke holes all over the cake. Pour the can of sweetened condensed milk over the top then pour the caramel ice cream topping over the top of that. 

Allow the cake to cool at room temperature then refrigerate for at least one hour, but it's truly best made a day ahead to really allow the topping to soak in. You can put the whipped cream on before popping it into the fridge or dollop on individual pieces as you serve. Sprinkle the top with chopped up Butterfinger or Heath toffee bar pieces. 

If you're feeling fancy, make your own whipped cream! Fresh is always better than the frozen chemical kind. Just whip up 1 cup of heavy whipping cream with 1-2 tablespoons of granulated sugar and 1/2 teaspoon of vanilla extract. 


poking holes into my prepared cake

yummy condensed milk and caramel poured on top


not many leftovers of this baby


top it off with whipped cream and candy bits

Ta-Da! 

Super simple, super delicious!