Wednesday, September 4, 2013

Egg Salad & Amma's Everything Dressing


I just adore my mother-in-law. She is so very thoughtful and kind. She and my father-in-law would give the shirts of their backs to help anyone who needed it. With all that sweetness and generosity, she still has some sass and can tell you what's what. She's the oldest of seven children and it shows. My father-in-law is 100% Icelandic so our girls call my in-laws "Amma" and "Afi" (Icelandic for grandmother and grandfather), special names for special people.

Amma authored one of my popular recipes "North Dakota Hotdish". As I shared in that post, she is one of those old-fashioned chefs that whips everything up from memory with a pinch of this and a dash of that. She makes everything with butter and cream (and love) and all things sinfully delicious (...but since she's not following a recipe we can all pretend it's only a "dab" of butter so it's not the calorie fest we fear.)

One of the things she's truly famous for is her salad dressing--coleslaw, potato salad, egg salad--really anything sweet and creamy that comes out of her kitchen contains a variation on this wonderful dressing. 

When we visited last week she just so happened to get called into work and she was disappointed that she wouldn't be there to make egg salad sandwiches for lunch. I jumped at the chance to get her to walk me through her recipe step by step and try it myself so here it is!

Amma's Egg Salad

Ingredients (amounts as close as I could figure from what she described):
1 cup Miracle Whip
1 cup heavy whipping cream
3 TB sugar
1-2 TB yellow mustard
a few drops of yellow food coloring
a dozen hard-boiled eggs

Directions:
Whip together the Miracle Whip (she uses the light version but regular will do too), heavy whipping cream and sugar until light and fluffy. Add the mustard. Start with one tablespoon of mustard and add more to your taste. 

To make the dressing classically yellow, add a few drops of yellow food coloring until you achieve the color you want. 

Chop up about a dozen hard-boiled eggs and gently fold in the dressing.

Amma uses this same recipe in her potato salad. For coleslaw, just skip the mustard and food coloring. Simple? Yes... but insanely delicious. 

 ingredients--Amma says to use ultra-pasteurized cream and the dressing will keep in the fridge for weeks (...not that anyone would let it go uneaten that long)

whipping up the cream, sugar and Miracle Whip

 a couple of tablespoons of mustard

 yum! light and fluffy and sweet

 add a few drops of food color to make it nice and yellow

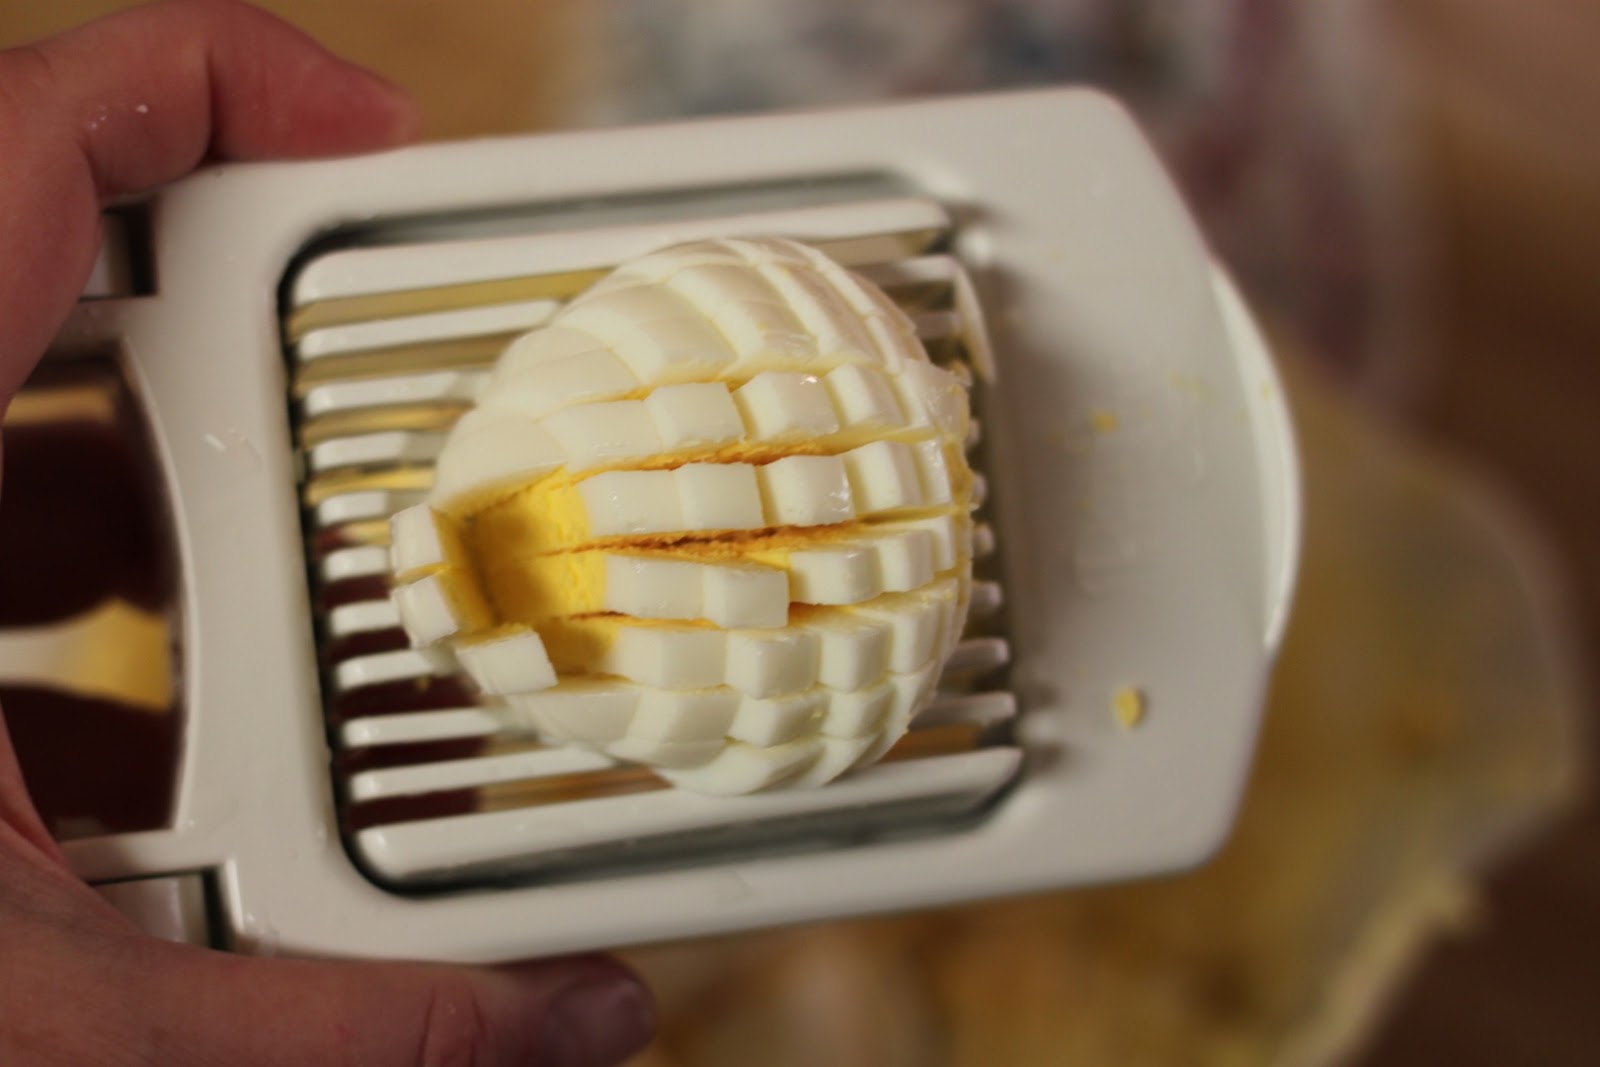
cut the eggs using a handy egg slicer

 and the other way

 fold the dressing into the chopped eggs

serve on rye bread

Amma approved my trial run on her recipe, though I admit I felt like it was missing something. Maybe it's just that special touch that Amma's bring to the kitchen. Maybe when I'm an "Amma", I'll have the special love that makes it just right. 

...and hold on a second. Can we just take a minute to talk about one of my favorite features of my mother-in-law's kitchen?


I loooooove this thing! It's a storage unit for flour, sugar, coffee and cookies. It has two levels with the second level fitting together like a puzzle. It is deliciously vintage and straight out of the 70's. I've never seen anything like it but if I did I'd snatch it in a second. It just reminds me so much of good times in Amma's kitchen.

And can I just say that the ratios are totally off for their kitchen. My father-in-law drinks coffee like it's going out of style yet it's the smallest container. :)

Tuesday, September 3, 2013

Cupcake Onesie


Well, here it is! My last monthly onesie for my GiGi. I'm not sure what symbol I would have done for August (maybe a popsicle or something beachy?) so I was glad to have her birthday fall this month so that I could celebrate with a fun cupcake. 

I made this one in a hurry so I failed to document each step but if you've been following my onesie project, you probably know the routine by now. If not, please check out some of my other posts

Here's How: Cupcake Onesie

Step 1: Find adorable image on good ol' google images that is easy to trace.
Step 2: Trace said adorable image backward on ironable fusible web
Step 3: Iron fusible on chosen fabric and cut it out
Step 4: Iron the cut outs onto onesie
Step 5: Sew edges (if desired. Just ironing is fine too.) and EMBELLISH!

I made a simple cupcake with some brown stripey fabric for the bottom and pink polka dot top. To embellish, I sewed a little pink button on top.

When I get a minute to do some photo editing, I'll surely put together a beauty of a collage with all of my onesies together. 

In the meantime, feast your eyes on this little sweetie. 


Happy Birthday, girly! Mom loves you!

Friday, August 30, 2013

DIY Window Pane Photo Gallery


Would you believe if I told you that Fargo is a hip town? Surely, we are. 

Sadly one of my biggest critiques about living in Fargo is that brand names are a heavy influence in North Dakota so sometimes the little guys suffer the consequences while chains and big box stores seem to rule the retail. However there are some really great gem local businesses that I frequent as much as my pocketbook allows. 

Eco Chic Boutique is one of those amazing little local places that make Fargo a place where hipster crafters can feel at home. It's also where I picked up this dandy window frame on sale for just a few bucks. I love the look of a scratched up old window pane. I had to snatch it when I saw it, though I had no idea at the time what I was going to do with it. It sat empty on a sad little open nail in our bedroom until a friend of mine posted this awesome window pane photo gallery on facebook so I had to make one of my own. 

Here's how:

DIY Window Pane Photo Gallery

Supplies needed are simple. I just got some photos printed and used spray adhesive to attach them. 

Step 1: I measured the glass panes inside the window and they were 7" square so I decided to print 5x7" prints and cut them down to 5" square. 

Step 2: I created a quick corner template for myself with a 1" border so that it would be quick and easy to line up my photos in the center of each pane. 

Step 3: I set the window face down on the table and lined up my template in the first pane.

Step 4: I lightly sprayed the front of each photo (yes, the front! ah!) with spray adhesive. I let them dry for a second to make the adhesive removable (follow package directions on your glue) and placed the picture in the pane along the template. 

I tested the photos to make sure they could be removed easily so that I could switch them out when I wanted. I also tested to make sure that the glue didn't show on the pictures from the front. You can kind of see it for extreme angles but not when you're looking face on. 

What a great way to display your favorite pictures! 


I printed 5x7 photos to fit in my 7" panel openings.  

Then I cut the images down to 5" squares to create a 1" border around the picture inside the window pane.


Trusty spray adhesive! I love this stuff. 
Be sure to spray the front of  the picture to stick it in the frame.


I created a corner template with 1" on each side to easily place my picture centered in the frame.

Placing the picture


There it is! A beauty for just a few bucks--$5 window pane, $5 worth of photo prints and a touch of spray adhesive.


Ta Da!

Thursday, August 22, 2013

My monkey turns 1! Pinspired: Monkey Cupcakes


My GiGi turned one! Man, it's been a fast year. I can't believe it.

So playing the good mom I wanted to bring some cupcakes to daycare to celebrate the occasion but as usual I was short on time so I googled cute kid cupcake ideas and came across this wonderfully simple idea from bigflavors.  

Here's how: Monkey Cupcakes

Supplies needed:

  • a box of Nilla wafers
  • a box of mini Nilla wafers
  • chocolate chips
  • red and black gel icing
  • chocolate frosting
  • a cake mix and supplies


Bake, cool and frost the cupcakes with chocolate frosting. I wish I had a wonderful cake recipe for you here but to this day I still haven't found a homemade cake recipe that I like so I still use box cakes. (Please comment if you have one you love!)

Place a large Nilla wafer along the bottom edge for the mouth and nose. Cut a mini Nilla wafer in half and stick into the frosting along the top of the cupcake for ears. Place two chocolate chips just above the large wafer for eyes. Use the red gel icing to draw a mouth and black to draw two dots for a nose and pupils for the chocolate chip eyes. That's it! 

They were a huge hit at daycare! I was told I was the "cool mom" of the day--an award I'll take any day. 

I made a variation for the family birthday party when I ran out of chocolate frosting. Bears! 

To match the monkey cupcakes, I created a monkey smash cake. I baked two 6" round cakes that I layered and frosted. I baked a large sugar cookie for the mouth and used Nilla wafers for the eyes and ears.  

Smash cake was definitely a hit! 

Curly girl got in on the action too. 


Yum! Now time for a bath.

Not quite walking yet but so close! (... she made the big move one week later.)

 Maybe it's cruel of me but I love a crying birthday picture.


Monday, August 19, 2013

DIY T-shirt Tote


Welcome back! I've taken a little blogging vacation with such a crazy summer schedule in July. I've got lots of great stuff to post so time to get back to it! 

This post comes with a bit of a story… I’ve written before about how much I love small town North Dakota culture. Last spring I was invited to a “Ladies Night” fundraiser for the local fire department. Basically you buy a ticket for a steak dinner, they have some fun activities and charitable gambling and the kicker—free drinks. Which really translates into “all you can drink” pretty quickly. So imagine a fire hall full of local ladies dressed the nines, dining on steaks and fishing beer out of huge tubs of ice and fighting each other over the last shots of hard liquor. Such a fun event… more fun when midnight hit and the really crazy activity started. Women holding each other's hair back so that they could “bob for beers” (unsuccessfully); sneaking tiny bottles of single serve wine in their purses; and, my favorite part, everyone piling into fire trucks and ambulances driven by our firemen for a safe ride home.

One of the traditions of this event is to buy “Ladies Night” t-shirts off the backs of the firemen. (I know this calls to mind images of sexy firemen and six-pack abs circling their hips while they spin their shirt above their head. Clearly NOT the case in a small town volunteer fireman in North Dakota. It was more like beer guts and bald heads while they carefully peeled off their outer shirt (because they learned long ago to wear many layers) so as to not let their bellies show. I had to get in on the action and buy one of these memorable neon yellow t-shirts but by the time I went for it, the only fireman left with a shirt wore a 2X so it didn’t quite fit into my wardrobe.

So I found myself trying to figure out with to do with it... Well of course, an upscale t-shirt project! How about a tote bag?

So here’s what I did with it…

Upscaled DIY T-Shirt Tote Bag
finished size (from a XXL t-shirt): 20" x 15", straps 27" long
click here for instructions without all the pictures and commentary

Step 1: Cut it up!

I wanted to save the chest print for a front pocket so I cut the front graphic into a 5"x 6" piece and set aside. To make the straps, I cut two 2" strips off of the bottom of the t-shirt and left them in a loop. I cut the sides and sleeves off of the remaining t-shirt. I used the full back and cut below the chest print for another rectangle to sew together with the back.


To get a good idea of what size I wanted, I measured my favorite canvas tote bag and added a few inches to make it just the right size. 

Here's my t-shirt before I whipped out my scissors.

Cutting off the bottom two 2" strips for my straps.

Cutting out the front graphic for my bag's pocket.

Cutting the back and leftover front to get the right amount of fabric.


Step 2: Piece and sew the main compartment together

I wanted the back graphic to be the star of the show and be centered on one side of the bag. The size of my t-shirt (XXL) allowed enough fabric that I folded the bottom part of the back to create a third of the front side of the t-shirt.


With right sides together, sew the front and back pieces together to form one long rectangle that is the width you want your bag to be and twice the height you want (because you'll fold this in half to create your bag)

I folded my bag in half and centered my image right where I wanted it. I trimmed up the sides and top so that they were exactly the way I wanted them. Fold the bag in half with the right sides together and sew the side seams.
To create the top seam, I folded over 1/2" then 1" to create a neat edge at the top. I zig-zag stitched around the bottom part of seam to complete the top edge. 


Step 3: Sew the straps

To create the straps, I cut two 2" wide strips from the bottom of the t-shirt (back in step one). I didn't get fancy with these and kept the edges raw. Knit fabric doesn't fray and I like the look and ease of a raw edge. I kept the full loop of the bottom of the t-shirt flat so that my straps were two layers of fabric to make them strong. Then I simply zig-zag stitched along each long edge. 

To attach the strap, I marked a spot about 2 1/2" from each top corner of my bag and pinned the straps in place. I sewed them in place by sewing a 1 1/2" box around the bottom with an X in the middle to make sure they were nice and secure. Repeat for all four corners. 

Two layers of fabric from my one long strip. Sew along the long edge to create the strap.


My strap placed near the corner of the bag and sewn in place with a box and X to make it secure.

Step 4: Sew the pocket in place

Obviously you can skip this step if you aren't putting a pocket on. I loved the front graphic and wanted to use it so I cut it into a 5"x6" rectangle (in step one). I folded over the top edge 1/2" to create a more secure and prettier edge to the top and zig-zag stitched it in place. I left the rest of the edges raw. I placed the pocket in the center above my seam that connected the front and back. I zig-zag stitched around the bottom three edges to secure it in place (be sure to back-stitch at the top corners to make it extra strong).

The front pocket sewn in place.

Here it is! The finished bag.


The finished product...
Front!

Back!

I must say, I'm obsessed with this bag. The t-shirt fabric is perfect because it stretches and you can stuff anything in it. The straps fit perfectly over my shoulder but in a pinch I can stretch them over my head to make it a cross-body bag. Wash it and everything returns to normal! I can't wait to make more!

Ta da!


Sunday, July 14, 2013

Upcycled Wainscot Sign


We had a wonderful summer vacation in Walker, MN. Walker is one of those adorable lakeside tourist towns in northern Minnesota. Lots of cute shops, locally owned restaurants, and antique stores!

I visited one of my very favorite antique stores in Dorset, MN not too far from Walker. They have a bit of a shabby chic style and offer beautifully crafted items and jewelry along with traditional antiques. As I walked in I saw this awesome little "beach" sign outside of the store and inspiration struck! I had leftover paneling from our bathroom remodel so I thought, what a great idea! Everywhere I went in Walker, shops carried signs that said "go jump in the lake" so I think it would make a perfect phrase for my sign.


Here's how: Upcycled Wainscot Sign

What you'll need:
  • a chunk of wainscot paneling (mine was about 24"x36")
  • chipboard letters that spell out what you like (mine are from Hobby Lobby--50% off!)
  • spray paint
  • hot glue & glue gun


You can find paneling at a home improvement store for $10-$15 for a 3'x4' piece or maybe try a thrift store that carries reuseable building supplies. We have one in Moorhead called ReStore that supports Habitat for Humanity. 

Rip down a piece of wainscot paneling to the size you like. I happened to have the perfect size piece but I used a circular saw to cut another piece for a different sign. 

Spray paint the letters and board in the colors you want. Place the letters and hot glue them to the sign. That's pretty much it!

*TIP! I used both spray paint from a craft store and some from a hardware store. Definitely go for the hardware store brands if you can! They were cheaper, higher quality and I was so surprised at the variety of colors I could find there! 


Thursday, July 11, 2013

Gnocchi with Zucchini & Cherry Tomatoes


So we've been little vacationistas the last couple of weeks so while I've been up to lots of projects I just haven't quite made the time to blog about it. Back to a regular schedule!

We continue with our incredible CSA farm, picking up our lovely veggies every Tuesday. One of my favorite experimental veggies surprised me when it appeared in the box--zucchini!


this week's box: lettuce, broccoli, cucumbers, tomatoes, onions and my star ZUCCHINI!

Let me tell you about zucchini in my family. My grandfather was an awesome gardener. I remember him planting two HUGE gardens (or maybe they just seemed huge to me) when I was little. My dad got the bug and we planted a little garden ourselves. My mom always insisted on planting zucchini and I was amazed at how large they would grow. Looking back the more amazing thing was what my mom did with it--desserts! I didn't eat zucchini as a vegetable until well into my adulthood. Zucchini for us meant cake, bread, or brownies. Now it's one of my favorite summer vegetables. 

I had to go with an old favorite recipe for this week's CSA box. It's so very simple, full of vegetables and just enough butter to make it all come together. It's also a great SUMMER make-ahead meal. I think it always tastes better the second day after all the juices have soaked into the gnocchi.

Gnocchi with Zucchini & Cherry Tomatoes
click title for easy printing


Ingredients
1 pound fresh or frozen gnocchi
2 tablespoons butter
2 medium shallots, thinly sliced
1 pound zucchini, (about 3 small), very thinly sliced lengthwise
1 pint cherry tomatoes, halved
1/2 teaspoon salt
1/4 teaspoon grated nutmeg
Freshly ground pepper, to taste
1 cup grated Parmesan cheese
1/2 cup chopped fresh parsley

Directions
Bring a large saucepan of water to a boil. Cook gnocchi until they float, 3 to 5 minutes or according to package directions. Ere on the side of underdone. DO NOT overcook or you’ll get a soupy mess by the time you add it to the vegetables later. Drain and set aside.

Use a vegetable peeler to slice the zucchini lengthwise in long ribbons. Cut the cherry tomatoes in half. (Tip! Put the tomatoes between two storage lids and run a knife between to make quick work of this.)

Meanwhile, melt butter in a large skillet over medium-high heat. Cook until the butter is beginning to brown, about 2 minutes. Add shallots and brown them a bit to start caramelizing them.  Add zucchini and cook, stirring often, until softened, 2 to 3 minutes.

Add tomatoes, salt, nutmeg and pepper and continue cooking, stirring often, until the tomatoes are just starting to break down, 1 to 2 minutes. Stir in Parmesan and parsley. Add the gnocchi and toss to coat. Serve immediately or cool and store for a make-ahead meal.


zucchini ribbons with a vegetable peeler 

my trick for cutting small tomatoes in half (thank you, Rachel Ray!) 

 pile between to storage lids, carefully slide a knife through

ta da! two swipes and I was done 

everything combined in the saucepan 

shredding up some parm cheese and chopping parsley 

 toss them in at the end and serve!

a delicious hot mess