Showing posts with label recipe. Show all posts

Tuesday, July 22, 2014

My favorite summertime treat--Bruschetta!


Nothing says summer like fresh produce! 

One of my all time favorite things to make in the summer is bruschetta (pronounced "brew-skett-ah" for us non-native Italians). For us in northern Minnesota, we haven't quite reached that gardening phase in the summer when you're surrounded by a million tomatoes that seem to ripen (then overripe) by the second but when we do, this is my go-to recipe to use up a lot of tomatoes quickly. 

Tomato Basil Bruschetta

8 small tomatoes, about 4 cups diced (Roma or plum tomatoes are my favorite for this but any will do)
8-10 fresh basil leaves (3-4 TB)
3-4 garlic cloves (2TB)
2 TB extra virgin olive oil
3 TB balsamic vinegar
Kosher salt, to taste
Fresh cracked pepper, to taste
1 loaf of french bread and additional olive oil and garlic for seasoning

Directions:

Peel the tomatoes. To do this, put the tomatoes in boiling water for no more than one minute to loosen the skins (parboil). Shock them with cold water to make sure they don't stew. Peel the skins off. Cut the tomatoes into wedges and remove the inner juice and seeds. Dice the tomato into small pieces (like the consistency of chunky salsa).

Finely chop the fresh basil and garlic cloves. Combine with the tomatoes and add the olive oil and vinegar. Taste as you go and adjust to your preferences. Add salt and pepper to taste. Refrigerate for at least an hour to allow the flavors to combine. This can be made a day ahead and enjoyed several days after (if it can last that long!)

To prepare the bread, slice the loaf into 1/2 inch slices and lay out flat on a cookie sheet lined with parchment paper. Brush a bit of olive oil on both sides (or leave it dry if you'd prefer to save a few calories). Bake at 375 for about five minutes on each side or alternatively, broil on low on each side for a few minutes. For extra flavor, sprinkle some salt or once the bread has cooled a bit, you can rub fresh garlic clove lightly over each piece. 

Serve together. You could also garnish with extra basil or a small hunk of Parmesan or mozzarella cheese. 

 some simple ingredients

 parboiling the tomatoes

see how easy that skin comes off? so worth the minute to boil them!

 the admittedly messy process of taking out the juice and seeds! 
I always have tomato juice dripping from my elbows

dice up the tomatoes nice and fine

basil and garlic

everything combined together! Yum!

 there it is... about to disappear!

Photos were all taken with my little iphone since I didn't have my fancy Canon at the lake house. Nice work, iphone. I knew you were meant for more than facebook!

 Enjoy!

-Nina

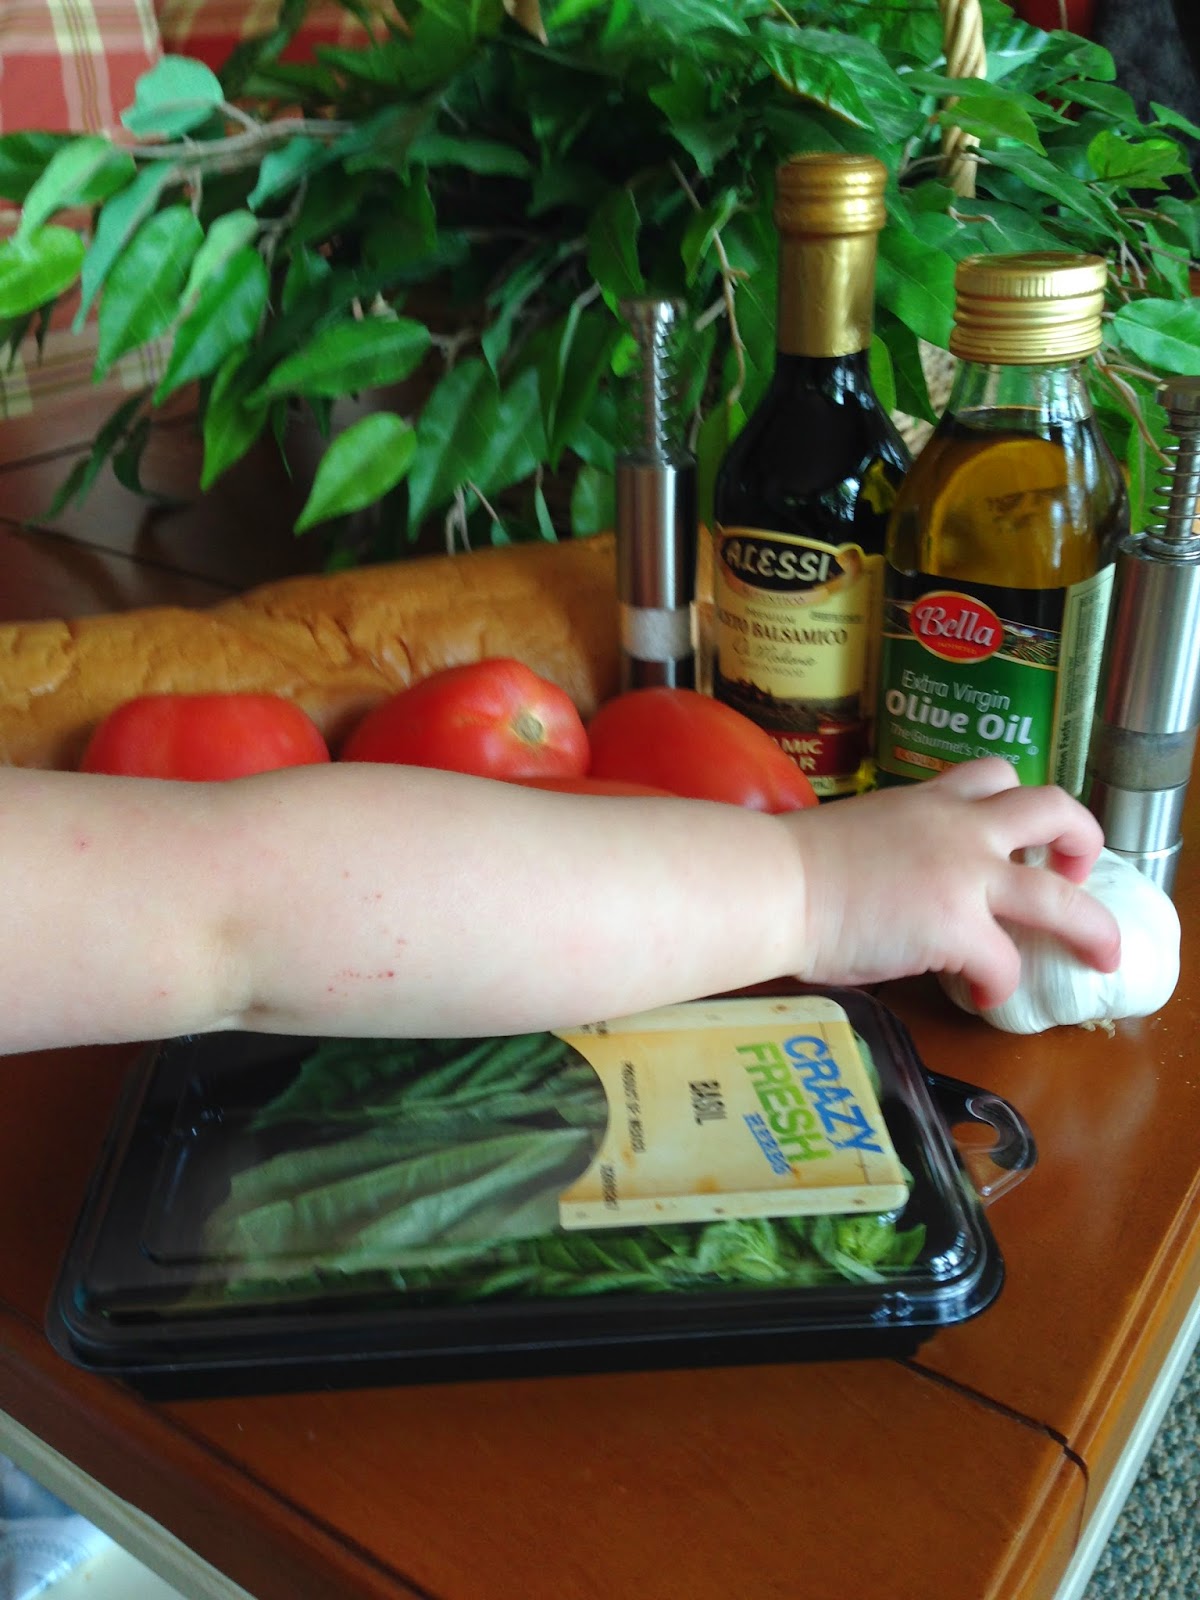
gigi kept taking bites out of my tomatoes and stealing my ingredients. ha ha! nothing like a toddler to make you laugh at your own foodie-ness

Monday, May 26, 2014

Make Ahead Monday: Freezer Meals


We're going on vacation next week--without children. Yikes! I can't wait but of course leaving my children for a week means much pre-planning and worrying on my part. Grandmas are coming to the rescue to watch over the babes but to keep things easy on them I prepared a bunch of freezer meals in advance so it would be one less thing for them to worry about. 

This is the second time I've done the crazy bulk assembly of freezer-friendly slow cooker meals and I'm thrilled with the result. One big list preparation, one shopping trip, a couple hundred bucks and one afternoon of assembly means a few months worth of meals that I don't have to plan and prepare for (mostly anyway). 

4 hours + $300 = 34 meals!
This is me looking like a crazy carnivore at the grocery store. 
Good thing there was a rockin' sale on meat for Memorial Day!

To make things even easier for you, I'm sharing my preparation so all you need to do is print and go! On my first round, I came across this wonderful little blog "Saving You Dinero" where she had posted several rounds of freezer meals. I repeated my favorites for this second time around. For my round II, I had to go to one of my favorite blogs Six Sister's Stuff. Both provide recipes, additional pictures and shopping lists but since I compiled them for my own use, I'll share them here too. I doubled everything so that I could make two of each meal.

Pulled Pork Sandwiches
Salsa Verde Pork 
a little spicy but so good!
Southwest Chicken
Hawaiian Chicken
 Beef Burritos
Garlic Honey Chicken 
serve as a protein or as a sandwich
Chicken Fajitas
Parmesan Honey Pork 
one of my hands down favorites!

Creamy Ranch Pork Chops
Creamy Salsa Chicken
Italian Beef Sandwiches
Sweet Teriyaki Chicken
Sweet Tangy Meatballs
Pineapple Glazed Ham
Beef and Mushrooms
Black Bean and Corn Salsa Chicken
BBQ Cranberry Chicken


all of my grocery items stacked and organized. I pre-cut my onions and 
bought some squeeze garlic instead of doing the extra mincing.

Parmesan Honey Pork... mmm...one of my favorites!
I tossed all of the ingredients in a freezer bag and made these labels so they would be easy to read and I'd remember additional instructions and what to serve with the meal.

 Here's round II of my freezer meals.

To find more recipes you need do little more than google "slow cooker freezer meals" or do a quick search on pinterest to find dozens of great website and full blogs committed to this effort (...heck maybe that's how you ended up here.)

After the first time I did my freezer meals, I found that writing on the bag worked well at first but by the end, much of the writing started to rub off. I decided to take it up a notch and buy some some shipping labels that I could type instructions on and put in a side dish suggestion or other instructions (some recipes have you add cheese, shred meat, serve on buns, etc.) so if my dear husband or grandma is preparing the meal they don't have to reference back to the recipe. 

Enjoy my handy work and give it a try! If you're a busy mom like me, you'll relish every time you pop open the freezer wondering "What's for dinner?".


-Nina

Saturday, May 10, 2014

The BEST Chocolate Chip Cookies…ever


Well… it's been a while. Sorry about that. I know my two followers have been sitting on the edge of their seats. ;)

So much has changed since I last posted in December.I got a new job. My husband got a new job. We bought a new house. We moved… and it's delicious. 

We decided that it was time for some serious change. When an awesome job opportunities came along in a community that we've been dreaming of moving to and it all came together in a matter of days, we knew God was shoving us out the door. Much scurry and stress later, we have finally settled (mostly) and I've been itching to get back on my blog on my old computer at my new desk. 

To celebrate my return to blogging, I thought it only fit to recover with one of my old faves. THE best chocolate chip cookies. ever… ever. 

Are you old enough to remember email forwards? If you are, you may remember an oldie but a goodie about a woman and her daughter who went to Neiman Marcus for lunch and the mom so loved the cookie she had for dessert that she asked for the recipe only to be charged some insane amount of money so she got her revenge by sending it out to everyone she knew over email asking them to forward it. False. But, a good cookie recipe regardless. So here's my slightly modified version. 

The Best Chocolate Chip Cookies. Ever. 
click above for easy print version

2 c. butter, softened
2 c. white sugar
2 c. brown sugar
4 eggs
2 ts. vanilla
5 c. oatmeal, blended
4 c. flour
2 ts. baking soda
2 ts. baking powder
1 ts. salt
12 oz. Hershey bar, grated
24 oz. chocolate chips (2 bags… I like milk chocolate chips for this one)
1-2 cups of chopped walnuts (totally optional. I don't like a ton of nuts myself.)

Cream butter and both sugars. Add the eggs and vanilla. Measure the oatmeal and blend in a blender or food processor to a fine powder. Mix flour, oatmeal, salt, baking powder and soda. Grate the Hershey bar and stir into the flour mixture. Combine the flour and butter and sugar mixture. Add chocolate chips and nuts. Roll into balls (about the size of ping pong balls) and place on a parchment papered cookie sheet. Bake for 10 minutes at 375 degrees. Makes 12 dozen (aka, a lot!)

Note that the cookies might look a little underdone at 10 minutes but I promise they turn out perfectly every time! Not too soft, not too crumbly. 


Blended oatmeal in my ninja

 
I used to actually bust out my box grater and scrape my knuckles on this madness… I since learned to use a ninja or food processor. It's a little less perfect but saves me a lot of time and frustration. I'll accept a little help in the kitchen any time. 

Here's that beautiful chocolate all crumble up to mix in with my flour. 

The "real" recipe calls for 3 cups of walnuts! I think it overwhelms the chocolate so I just grab a good handful of walnuts, chop them fine and toss them in. 

Here's the dough. Don't be afraid to get your hands in there. It's way too much dough to waste time with a wooden spoon. 

Yup, that's after 10 minutes. They look underdone but if you leave them to cool a few minutes, they settle into these delicious babies:


There they are! A little more complex than your average chocolate chip cookie but so worth it! Enjoy!


~Nina


Tuesday, November 12, 2013

Homemade Chicken Stock


Want your chicken soup to have true healing powers? There is nothing. Nothing. Better than homemade chicken stock. ...ok, so maybe that's a little dramatic. There are better things in life... But if you pride yourself as a decent cook, this is definitely a bucket list item. The great thing? It really doesn't even take that much effort. It mostly just takes a really big pot.

We've tried a few different stock recipes and it is certainly something that you can customize according to your own flavor preferences but for us, Ina Garten has it down.

Homemade Chicken Stock
recipe from Ina Garten
click above for my easy print google doc

Ingredients


3 (5-pound) roasting chickens
3 large yellow onions, unpeeled and quartered
6 carrots, unpeeled and halved
4 stalks celery with leaves, cut into thirds
4 parsnips, unpeeled and cut in half, optional
20 sprigs fresh parsley
15 sprigs fresh thyme
20 sprigs fresh dill
1 head garlic, unpeeled and cut in 1/2 crosswise
2 tablespoons kosher salt
2 teaspoons whole black peppercorns

Directions

Place the chickens, onions, carrots, celery, parsnips, parsley, thyme, dill, garlic, and seasonings in a 16 to 20-quart stockpot. Add 7 quarts of water (or enough to cover everything) and bring to a boil. Simmer, uncovered, for 4 hours. After an hour of simmering, you can remove the chickens and remove the meat from the bones to use in other recipes (like chicken soup!). Return the bones back to pot for the remaining three hours. Strain the entire contents of the pot through a colander and discard the solids. Chill the stock overnight. The next day, remove the surface fat. Use immediately or pack in containers and freeze for up to 3 months.

Did your stock get a little jelly overnight? Pat yourself on the back! That means you've got a super rich stock! I know I freaked out the first time I ran into that. It's not fat. Collagen in the bones gets drawn out the longer you let it simmer. 


Monday, November 4, 2013

Perfect Roast Chicken


The perfect roast chicken. There is nothing more classic. I've made more than a few in my days but I just keep coming back to this recipe from one of my Food Network faves Ina Garten. No one does classic like she does. 

I love her combination of vegetables in this one, particularly the fennel. It might be silly but this vegetable was literally on my bucket list of ingredients to use. I LOVE roasted vegetables and roasted fennel in this recipe turned out sweet with a hint of licorice and was delish. You can also toss in brussel sprouts or potatoes or parsnips if you want to change it up. 

Perfect Roast Chicken
click above for an easy print google doc

Ingredients:
1 roasting chicken (5-6lbs)
Kosher salt
Freshly ground black pepper
1 large bunch of fresh thyme
1 lemon, halved
1 head of garlic, cut in half crosswise
2 TB butter, softened
1 large yellow onion, thickly sliced
4 carrots cut into 2-inch chunks
1-2 bulbs of fennel, tops removed and cut into wedges through the root
Olive oil

Directions:

Prepare the vegetables and place in the bottom of a roasting pan covered in aluminum foil. (I love roasting but it can create a sticky mess so be sure to take a minute to cover the pan.) Toss with salt, pepper, 20 or so sprigs of thyme and olive oil. Spread around the pan to create a roasting rack for the chicken.

Prepare the chicken by removing giblets and giving it a good rinse inside and out, removing excess fat or pinfeathers. Use a paper towel to pat the outside dry. Liberally salt and pepper the inside cavity. Stuff the cavity with a handful of thyme, half of the lemon and the split head of garlic. Close it off with the other half of the lemon. Rub the outside of the chicken with butter. (If you want to be neat about this, you can melt it and brush it like Ina but I like to give the chicken a good rub down.) Liberally salt and pepper the outside of the chicken with salt and pepper. Tie the legs together with kitchen string and tuck the wings under the body of the chicken.

Place the chicken on top of the vegetables. Roast the chicken for about 90 minutes or until the juices run clear when you poke it between a leg and thigh or a meat thermometer reaches 160 degrees.


My veggies all chopped up and ready for roasting. 
You can see I did toss in some brussel sprouts this round.  

The chicken all rubbed down and ready to be cooked. 

Done! with a little lemon poking out of the back. 

This can even been a great "prep ahead" meal. For my make ahead meal schedule, I've put this all together on Sunday night and covered the roasting pan with aluminium foil The night day I plan to serve it, I pop it in the oven before I head to work and set the delay start on my oven so that it's just about done when I get home with the girlies. I've also bought double the recipe and pre-prepped extra veggies and the cavity stuffing to put in the freezer for future cooking.


Happy cooking!

-Nina

Friday, November 1, 2013

Pumpkin Curry


One of my absolutely favorite fall traditions is making pumpkin curry. We discovered this three years ago when we first joined our CSA farm and received a half dozen pumpkins during the fall season. Outside of make pies and treats, we had no idea what to do with them! So we searched for some savory recipes and discovered the idea of pumpkin curry. We've played around with recipes and settled on these ingredients. 

We loooooove international cuisine, particularly Thai.  Once upon a time we lived in Minneapolis and had a ton of restaurants at our fingertips so we could be picky little food snobs who would go to one place for curry and another for noodles and another for stir fry. Now that we live in Fargo, that level of selection isn't available to us anymore so we've been forced into the kitchen to experiment and concoct the flavor profiles that we really love. 

If you love creamy, sweet, spicy Thai curry, this recipe is for you! With just a few simple ingredients you can really taste each thing. If you haven't experimented with international cuisine, this is an easy one to start with. 

click above for a link to my easy print google doc

Ingredients:
         1-14oz can coconut milk
         2 TB red curry paste
         1 lb fresh sweet pumpkin, peeled, seeded and cubed
         1 chili pepper (jalapeño is great for this)
         4-5 kaffir lime leaves (try your local Asian market for these)
         7-8 thai basil leaves
         1 cup chicken or vegetable stock
         salt, to taste
         1 cup shredded chicken, optional

Directions:
Prepare pumpkin by peeling and removing seeds. Cut into about 1 1/2 inch cubes. Some small and big is good. The smaller cubes will dissolve to thicken the curry. Julienne the pepper. Tear the center stem from the kaffir lime leaves and julienne the Thai basil.

Pour half of the coconut milk into a pot over medium heat. Add the red curry paste and mix it well with coconut milk. Stir to prevent the bottom from sticking and burning. Simmer until a reddish oil ring starts to form, then stir to let the oil bring out the flavor and aroma in the spices.

Add the pumpkin and stir to coat pumpkin with curry sauce. Add the rest of coconut milk and stock. Season with salt; start with a teaspoon and taste. Prepared curry paste can vary in salt content so increase salt to taste. Simmer until the pumpkin is soft, about 25 minutes.

Add sliced pepper and kaffir lime leaves. Add Thai basil. Turn off the heat and allow to cool slightly and combine flavors.

This is a great make ahead or freezer meal as the flavors will increase as it rests.


A handful of relatively simple ingredients


Prepare pumpkin by cutting into about 1 1/2 inch cubes

Julienne basil and pepper. Tear lime leaves from step and tear or chop into smaller pieces

Let coconut milk and curry paste simmer to bring the oil out

Add pumpkin and stir to coat pumpkin in curry. Add the other half of the coconut milk and stock. Simmer until pumpkin is tender and smaller pieces break apart to thicken the curry. Add salt to taste. If you want a slightly sweeter curry, you could also add in a tablespoon or two of brown sugar. 

At the last minute, add the pepper, basil and lime leaves. You can also stir in some precooked chicken at this point if you want to add a protein to the dish.

There it is! Yummy sweet, spicy pumpkin curry.

Happy cooking!

-Nina


Wednesday, September 11, 2013

"Elvis" Cupcakes: Peanut Butter & Banana


Recently I was invited to a potluck cook out at my church so I used it as an excuse to come up with something pretty to make. We had collected just a ton of overripe bananas  in our freezer so I thought it might be time to use some up. Most of my banana recipes are breakfast oriented so I thought I'd try my hand at some cupcakes. Immediately the idea of "Elvis" cupcakes came to mind combining banana cake with peanut butter frosting. 

Funny story? So I bring said cupcakes to the cook out with the label "Elvis Cupcakes" describing them as banana cake with peanut butter frosting and I had at least three people ask me what that had to do with Elvis (maybe you're wondering the same thing). I was shocked! I thought Elvis' love of fried peanut butter & banana sandwiches was common knowledge... but perhaps Elvis has lost his grip on pop culture trivia. Learn more about Elvis' love of fatty foods in this great NPR story or watch this super awkward Elvis impersonator making his own version. 

Anyway! Here goes the recipe. 

Elvis Peanut Butter & Banana Cupcakes
click above for an easy print version

Ingredients:
For the cupcake from ilovepeanutbutter.com
very ripe banana
1 teaspoon lemon juice
whole eggs
1 cup plus 2 tablespoons cake flour
½ cup sugar
2 teaspoons baking powder
¼ teaspoon kosher salt
6 tablespoons very soft, unsalted butter


For the icing:
1 cup powdered sugar
1 cup creamy peanut butter
5 tablespoons unsalted butter, at room temperature
3/4 teaspoon pure vanilla extract
1/4 teaspoon kosher salt
1/3 cup whipping cream 


For the butter-fried breadcrumbs (if you're feeling fancy):
2 tablespoons unsalted butter
¼ cup panko bread crumbs

1 tablespoon sugar
pinch of salt


Directions: 


Preheat the oven to 350°F and line a muffin pan with cupcake liners.
Mash together the banana and lemon juice until smooth, then whisk in the eggs. In another bowl, use a fork to whisk together the cake flour, sugar, baking powder and salt. Beat in the butter until well incorporated. Add the banana and egg mixture and mix until just combined.

Fill the cupcake liners 2/3 full with batter. Bake for 15-20 minutes until a toothpick inserted in the cake comes out clean. Be careful not to overbake so that your cupcakes don't come out dry. 

Allow to cool completely and pipe on the icing. 

For the icing, combine the powdered sugar, peanut butter, butter, vanilla, and salt. Mix on medium-low speed until creamy, scraping down the bowl with a rubber spatula as you work. Add the cream and beat on high speed until the mixture is light and smooth. 

If you're feeling fancy, take a few minutes to fry some panko breadcrumbs with butter and a bit of sugar and a pinch of salt to sprinkle over the top. Be sure to let them cool before sprinkling on your cupcakes. 


Beautiful and delicious!

Boy that Elvis had something going. Now you can share a little Elvis history with your friends. 


curly girl thinks you should eat one

Thursday, September 5, 2013

Better Than (you know what) Cake


Earlier this month we traveled home and had a little birthday celebration for my GiGi and my wonderful sister-in-law. I offered to make the dessert and asked my SIL what she might like and she said, "You what would be good..." and this was the result! 

Having eaten this cake a bazillion times at potlucks and at my favorite downtown Fargo lunch spot the VIP room (they call it BTS cake, which cracks me up!), I am surprised I've never made it or had much thought about what actually went into delicious treat. It's surprisingly simple! 

Here's how:

Better than Sex Cake

Ingredients:
1-chocolate cake mix and supplies
1-14-oz. can of sweetened condensed milk
1-12oz. jar of caramel ice cream topping (the thick stuff!)
8 oz. of whipped cream or cool whip 
1 cup of chopped Butterfinger or Heath bars (2-3 bars should do it)

Directions:
Take note (because I didn't!) that this cake should be made a day ahead for maximum "sexiness". 

Make the chocolate cake mix as directed on the box (or make a homemade chocolate cake if you're fancy.) Using the end of a wooden spoon (or whatever you have handy), poke holes all over the cake. Pour the can of sweetened condensed milk over the top then pour the caramel ice cream topping over the top of that. 

Allow the cake to cool at room temperature then refrigerate for at least one hour, but it's truly best made a day ahead to really allow the topping to soak in. You can put the whipped cream on before popping it into the fridge or dollop on individual pieces as you serve. Sprinkle the top with chopped up Butterfinger or Heath toffee bar pieces. 

If you're feeling fancy, make your own whipped cream! Fresh is always better than the frozen chemical kind. Just whip up 1 cup of heavy whipping cream with 1-2 tablespoons of granulated sugar and 1/2 teaspoon of vanilla extract. 


poking holes into my prepared cake

yummy condensed milk and caramel poured on top


not many leftovers of this baby


top it off with whipped cream and candy bits

Ta-Da! 

Super simple, super delicious!