Showing posts with label treats. Show all posts

Saturday, May 10, 2014

The BEST Chocolate Chip Cookies…ever


Well… it's been a while. Sorry about that. I know my two followers have been sitting on the edge of their seats. ;)

So much has changed since I last posted in December.I got a new job. My husband got a new job. We bought a new house. We moved… and it's delicious. 

We decided that it was time for some serious change. When an awesome job opportunities came along in a community that we've been dreaming of moving to and it all came together in a matter of days, we knew God was shoving us out the door. Much scurry and stress later, we have finally settled (mostly) and I've been itching to get back on my blog on my old computer at my new desk. 

To celebrate my return to blogging, I thought it only fit to recover with one of my old faves. THE best chocolate chip cookies. ever… ever. 

Are you old enough to remember email forwards? If you are, you may remember an oldie but a goodie about a woman and her daughter who went to Neiman Marcus for lunch and the mom so loved the cookie she had for dessert that she asked for the recipe only to be charged some insane amount of money so she got her revenge by sending it out to everyone she knew over email asking them to forward it. False. But, a good cookie recipe regardless. So here's my slightly modified version. 

The Best Chocolate Chip Cookies. Ever. 
click above for easy print version

2 c. butter, softened
2 c. white sugar
2 c. brown sugar
4 eggs
2 ts. vanilla
5 c. oatmeal, blended
4 c. flour
2 ts. baking soda
2 ts. baking powder
1 ts. salt
12 oz. Hershey bar, grated
24 oz. chocolate chips (2 bags… I like milk chocolate chips for this one)
1-2 cups of chopped walnuts (totally optional. I don't like a ton of nuts myself.)

Cream butter and both sugars. Add the eggs and vanilla. Measure the oatmeal and blend in a blender or food processor to a fine powder. Mix flour, oatmeal, salt, baking powder and soda. Grate the Hershey bar and stir into the flour mixture. Combine the flour and butter and sugar mixture. Add chocolate chips and nuts. Roll into balls (about the size of ping pong balls) and place on a parchment papered cookie sheet. Bake for 10 minutes at 375 degrees. Makes 12 dozen (aka, a lot!)

Note that the cookies might look a little underdone at 10 minutes but I promise they turn out perfectly every time! Not too soft, not too crumbly. 


Blended oatmeal in my ninja

 
I used to actually bust out my box grater and scrape my knuckles on this madness… I since learned to use a ninja or food processor. It's a little less perfect but saves me a lot of time and frustration. I'll accept a little help in the kitchen any time. 

Here's that beautiful chocolate all crumble up to mix in with my flour. 

The "real" recipe calls for 3 cups of walnuts! I think it overwhelms the chocolate so I just grab a good handful of walnuts, chop them fine and toss them in. 

Here's the dough. Don't be afraid to get your hands in there. It's way too much dough to waste time with a wooden spoon. 

Yup, that's after 10 minutes. They look underdone but if you leave them to cool a few minutes, they settle into these delicious babies:


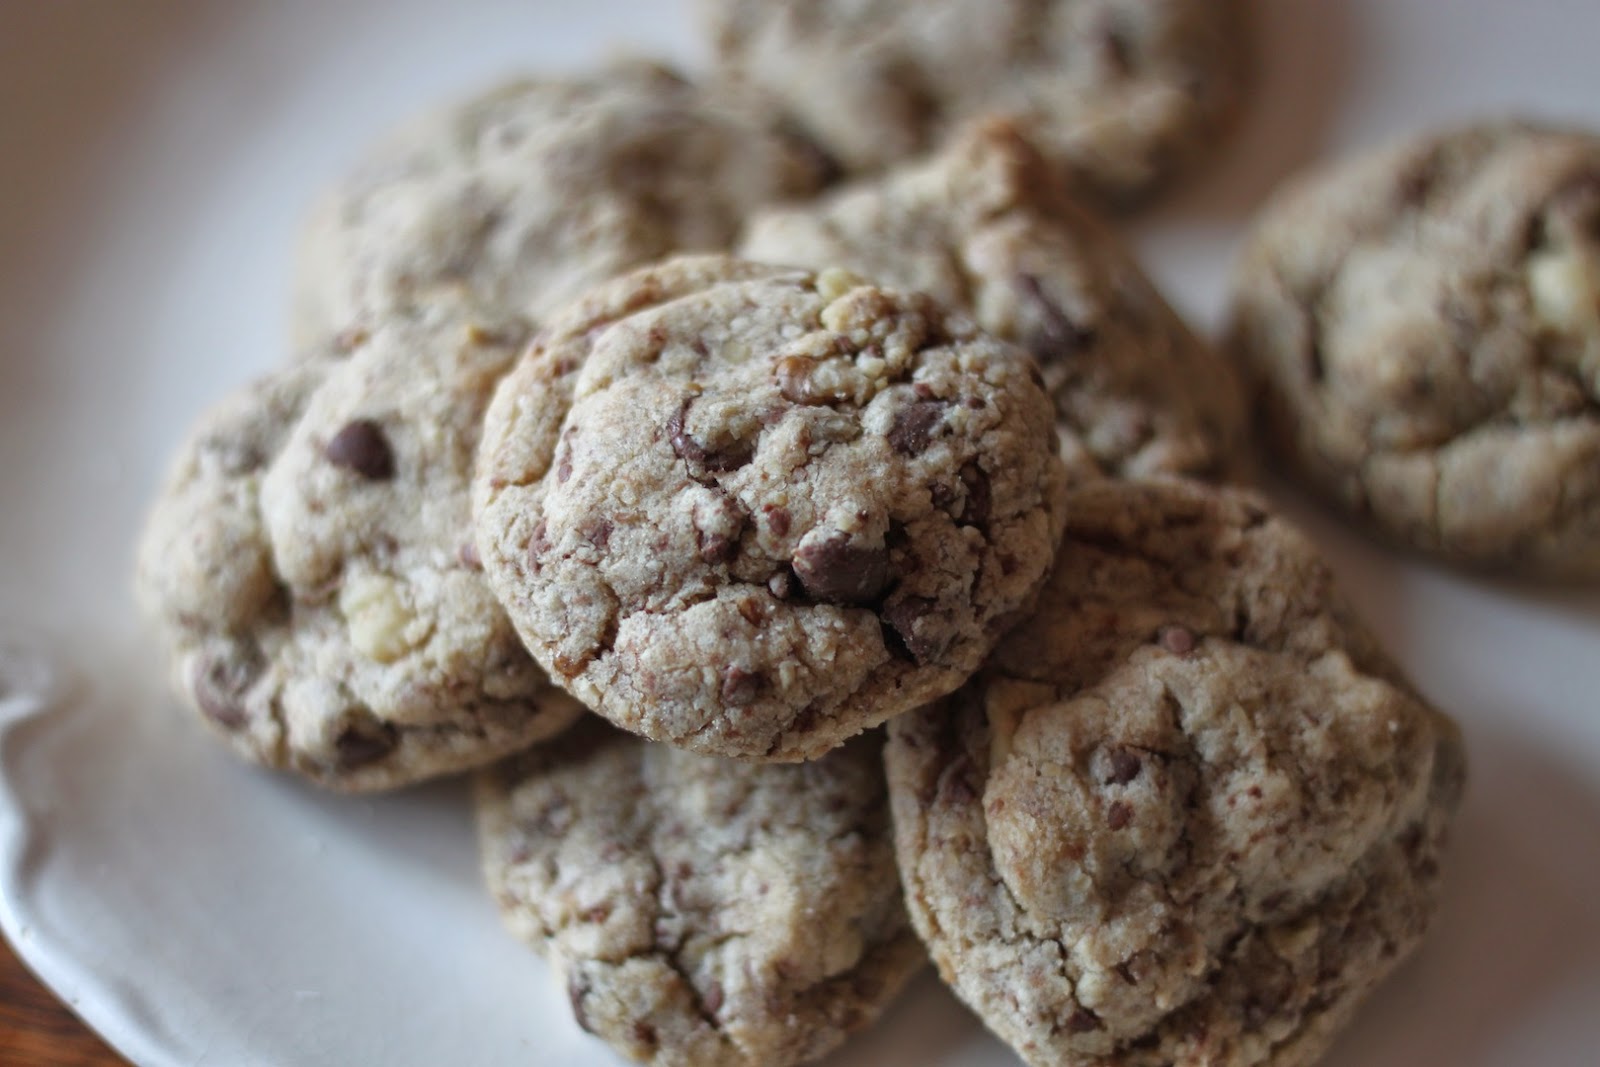
There they are! A little more complex than your average chocolate chip cookie but so worth it! Enjoy!


~Nina


Saturday, November 23, 2013

Sunshine and Rainbows Cupcakes


My Curly Girl is three!

So being the DIY mom I am, I just had to come up with a cute cupcake decoration to send to daycare with my girly!

Sunshine cupcakes made with yellow frosting, candy corn rays, M&M eyes and a gel frosting mouth.

Rainbow cupcakes made with blue frosting, "Brite Crawler" gummy worm rainbow and marshmallow clouds.

Big hit with the toddlers, I tell you! The most fun part was hearing Curly Girl recant what each kid chose. "Jack chose suns. He likes 'lello'. Trina had an airplane..." (Which must have been what the rainbows became.)

Homemade frosting? Of course! Why go for that canned stuff when making homemade is as easy as 1-2-3!

Quick & Easy Buttercream Frosting
1 cup butter, room temperature
1 teaspoon vanilla
2 tablespoons milk or whipping cream
3 cups powdered sugar

Whip the ingredients together until light and fluffy. Adjust ingredients as needed (more sugar for stiffness, more milk for fluffiness). Drop in food coloring a few drops at a time until you reach desired color, if needed. 

Happy birthday, my girl! You bring me sunshine and rainbows and everything lovely to my life each day!

Wednesday, September 11, 2013

"Elvis" Cupcakes: Peanut Butter & Banana


Recently I was invited to a potluck cook out at my church so I used it as an excuse to come up with something pretty to make. We had collected just a ton of overripe bananas  in our freezer so I thought it might be time to use some up. Most of my banana recipes are breakfast oriented so I thought I'd try my hand at some cupcakes. Immediately the idea of "Elvis" cupcakes came to mind combining banana cake with peanut butter frosting. 

Funny story? So I bring said cupcakes to the cook out with the label "Elvis Cupcakes" describing them as banana cake with peanut butter frosting and I had at least three people ask me what that had to do with Elvis (maybe you're wondering the same thing). I was shocked! I thought Elvis' love of fried peanut butter & banana sandwiches was common knowledge... but perhaps Elvis has lost his grip on pop culture trivia. Learn more about Elvis' love of fatty foods in this great NPR story or watch this super awkward Elvis impersonator making his own version. 

Anyway! Here goes the recipe. 

Elvis Peanut Butter & Banana Cupcakes
click above for an easy print version

Ingredients:
For the cupcake from ilovepeanutbutter.com
very ripe banana
1 teaspoon lemon juice
whole eggs
1 cup plus 2 tablespoons cake flour
½ cup sugar
2 teaspoons baking powder
¼ teaspoon kosher salt
6 tablespoons very soft, unsalted butter


For the icing:
1 cup powdered sugar
1 cup creamy peanut butter
5 tablespoons unsalted butter, at room temperature
3/4 teaspoon pure vanilla extract
1/4 teaspoon kosher salt
1/3 cup whipping cream 


For the butter-fried breadcrumbs (if you're feeling fancy):
2 tablespoons unsalted butter
¼ cup panko bread crumbs

1 tablespoon sugar
pinch of salt


Directions: 


Preheat the oven to 350°F and line a muffin pan with cupcake liners.
Mash together the banana and lemon juice until smooth, then whisk in the eggs. In another bowl, use a fork to whisk together the cake flour, sugar, baking powder and salt. Beat in the butter until well incorporated. Add the banana and egg mixture and mix until just combined.

Fill the cupcake liners 2/3 full with batter. Bake for 15-20 minutes until a toothpick inserted in the cake comes out clean. Be careful not to overbake so that your cupcakes don't come out dry. 

Allow to cool completely and pipe on the icing. 

For the icing, combine the powdered sugar, peanut butter, butter, vanilla, and salt. Mix on medium-low speed until creamy, scraping down the bowl with a rubber spatula as you work. Add the cream and beat on high speed until the mixture is light and smooth. 

If you're feeling fancy, take a few minutes to fry some panko breadcrumbs with butter and a bit of sugar and a pinch of salt to sprinkle over the top. Be sure to let them cool before sprinkling on your cupcakes. 


Beautiful and delicious!

Boy that Elvis had something going. Now you can share a little Elvis history with your friends. 


curly girl thinks you should eat one

Thursday, September 5, 2013

Better Than (you know what) Cake


Earlier this month we traveled home and had a little birthday celebration for my GiGi and my wonderful sister-in-law. I offered to make the dessert and asked my SIL what she might like and she said, "You what would be good..." and this was the result! 

Having eaten this cake a bazillion times at potlucks and at my favorite downtown Fargo lunch spot the VIP room (they call it BTS cake, which cracks me up!), I am surprised I've never made it or had much thought about what actually went into delicious treat. It's surprisingly simple! 

Here's how:

Better than Sex Cake

Ingredients:
1-chocolate cake mix and supplies
1-14-oz. can of sweetened condensed milk
1-12oz. jar of caramel ice cream topping (the thick stuff!)
8 oz. of whipped cream or cool whip 
1 cup of chopped Butterfinger or Heath bars (2-3 bars should do it)

Directions:
Take note (because I didn't!) that this cake should be made a day ahead for maximum "sexiness". 

Make the chocolate cake mix as directed on the box (or make a homemade chocolate cake if you're fancy.) Using the end of a wooden spoon (or whatever you have handy), poke holes all over the cake. Pour the can of sweetened condensed milk over the top then pour the caramel ice cream topping over the top of that. 

Allow the cake to cool at room temperature then refrigerate for at least one hour, but it's truly best made a day ahead to really allow the topping to soak in. You can put the whipped cream on before popping it into the fridge or dollop on individual pieces as you serve. Sprinkle the top with chopped up Butterfinger or Heath toffee bar pieces. 

If you're feeling fancy, make your own whipped cream! Fresh is always better than the frozen chemical kind. Just whip up 1 cup of heavy whipping cream with 1-2 tablespoons of granulated sugar and 1/2 teaspoon of vanilla extract. 


poking holes into my prepared cake

yummy condensed milk and caramel poured on top


not many leftovers of this baby


top it off with whipped cream and candy bits

Ta-Da! 

Super simple, super delicious!

Wednesday, May 22, 2013

Super Simple Strawberry Cake


My curly girl LOVES strawberries. Really. Loves. Strawberries. ... so we almost always have them in stock. Of course when you buy some strawberries that quickly go beyond their prime, you need to find something to do with them so this Martha Stewart recipe became a big winner in our house. It comes together so easily for a from-scratch cake recipe.

i made this for a social so i added an extra half to the recipe and it worked perfectly in an 8x13 cake pan
Strawberry Cake
original recipe by Martha Stewart

Ingredients:

6 tablespoons unsalted butter, softened, plus more for pie plate
1 1/2 cups all-purpose flour
1 1/2 teaspoons baking powder
1/2 teaspoon salt
1 cup plus 2 tablespoons sugar
1 large egg
1/2 cup milk
1 teaspoon pure vanilla extract
1 pound strawberries, hulled and halved (I couldn't fit this many on my cake so if you're a little low, no worries!)

Directions:

Preheat oven to 350 degrees. Butter a 10-inch pie plate. Sift flour, baking powder, and salt together into a medium bowl. 
Put butter and 1 cup sugar in the bowl of an electric mixer fitted with the paddle attachment. Mix on medium-high speed until pale and fluffy, about 3 minutes. Reduce speed to medium-low; mix in egg, milk, and vanilla.  
Reduce speed to low; gradually mix in flour mixture. Transfer batter to buttered pie plate. Arrange strawberries on top of batter, cut sides down, and as close together as possible. Sprinkle remaining 2 tablespoons sugar over berries. 
Bake cake 10 minutes. Reduce oven temperature to 325 degrees. Bake until cake is golden brown and firm to the touch, about 1 hour. Let cool in pie plate on a wire rack. Cut into wedges. Cake can be stored at room temperature, loosely covered, up to 2 days.

BONUS! I just had to make it my own so I also made a lemon glaze to put on the side. To make a simple lemon glaze, simply mix together a few tablespoons of lemon juice (fresh squeezed preferred always) with about a 1/2 cup of powdered sugar. You can play with the ratio of lemon juice to powdered sugar until you get a nice drizzly texture and the sweetness that you like. 

Enjoy! 
 

Friday, May 10, 2013

"Copy Cat" Soft Batch Cookies

 
I've been looking forever for just that perfect basic chocolate chip cookie recipe. I've tried a bunch--some too much butter, some too cakey, some not enough chocolate chips. My husband found this one on allrecipes and it's been a winner ever since! 

My husband is a Keebler Soft Batch addict! I've never been able to get over the chemical taste so I'm not a fan but I love that these cookies come out perfect every time and taste just like how "soft batch" cookies should be. Soft but not in an underbaked way. Check 'em out!

Copy Cat Soft Batch Cookies
click above for an easy print copy
Ingredients
1 cup butter, softened
1 cup white sugar
1 cup packed brown sugar
2 eggs
2 teaspoons vanilla extract
3 cups all-purpose flour
1 teaspoon baking soda
2 teaspoons hot water (I think this is the secret!)
1/2 teaspoon salt
2 cups chocolate chips (I'm a milk chocolate gal... but whatever you like!)
           
Directions
Preheat oven to 350 degrees.
Cream together the butter, white sugar, and brown sugar until smooth. Beat in the eggs one at a time. Stir in the vanilla. Dissolve baking soda in hot water. Add to batter along with the salt. Stir in flour. Finally mix in the chocolate chips. 

I like to make these kinda small so I use just about a tablespoon of batter, roll into a ball and drop onto a parchment paper covered cookie sheet.

Bake for exactly 10 minutes in a preheated oven. The edges and top should be just getting a little golden. 

Enjoy!

Sunday, April 14, 2013

Peanut Butter & Chocolate Cupcakes


Could there be a better combination? Yum!

One of my dear, dear students had her last day with us on Thursday so I wanted to mark the event with a special treat. After an epic pinterest fail with some "Snickers" themed cupcakes the previous weekend, I settled on something a tad simpler and totally redeemed myself!

Here's how:

Peanut Butter & Chocolate Cupcakes
click for easy printing

Ingredients:
1 chocolate cake mix and the additional ingredients required on the box

For the filling:
1/2 cup creamy peanut butter
3 oz cream cheese 
3 TB of white sugar
1-2 TB of whipping cream

For the icing:
1 cup powdered sugar 
1 cup creamy peanut butter 
5 tablespoons unsalted butter, at room temperature 
3/4 teaspoon pure vanilla extract 
1/4 teaspoon kosher salt 
1/3 cup whipping cream 


Directions:

To make the cake, I just used a chocolate cake mix (because I still haven’t found a scratch recipe that I like. If you have any recommendations, please comment!) Whip it up per the box's instructions and set aside.

For the peanut butter filling, mix ½ cup of peanut butter, 3 oz of cream cheese, 3 tablespoons of sugar and a tablespoon of cream. Whip it up with your mixer. Fill your cupcakes ½ way up with cake batter, drop in about a tablespoon of the peanut butter batter and top it off with a little more cake batter. (My ratio on the filling was a bit off so you'll likely have extra.) Bake the cupcake according to directions on your cake mix.

Allow to cool thoroughly before topping it off with icing. 

The icing came from a great recipe from one of my favorite ladies Ina Garten. Super simple and yes, I really did only use 1 cup of powdered sugar! (If you're not usually the homemade type, homemade frosting usually requires 3-4 cups so that seemed strang to me.)

Combine the powdered sugar, peanut butter, butter, vanilla, and salt. Mix on medium-low speed until creamy, scraping down the bowl with a rubber spatula as you work. Add the cream and beat on high speed until the mixture is light and smooth. 


the peanut butter filling

drop about a tablespoon of the filling in your cupcake filled about halfway with cake batter

drop another tablespoon or two on top of the filling to cover it up 


 The inside of the cupcake. The peanut butter filling mixes in and looks just like the cake but it's a yummy peanut butter surprise. It did sink to the bottom... but as others told me, that kinda worked so that you got peanut butter on the top and bottom with chocolate in the middle.


Enjoy!

Wednesday, February 20, 2013

PINSPIRED: Salted Caramel Chocolate Chip Cookies


I've been trying to think of some regular features for my blog and I was "inspired" by some pinterest ideas I've run across so I thought "PINSPIRED" might be a nice tagline. 

A couple of weeks ago I had at least a half dozen friends pin the same cookie recipe for Salted Caramel Chocolate Chip Cookies. Salted caramel is all the rage and I needed to bring something to a superbowl party so I thought I'd give it a shot. 


Yum! 


...is about all I can say about them. Rave reviews!


I’ve included the original recipe below, but basically:
  1. Mix a batch of your favorite chocolate chip cookie recipe.
  2. Cut a fun-size Milky Way Simply Caramel in half.
  3. Dip the open end in sea salt (secret? I just used regular table salt).
  4. Cover the candy with your cookie dough and form into a ball.
  5. Sprinkle the top with a little more salt (I used kosher salt on top).
  6. BAKE! (325 for 17 minutes)


A few tips: I went according to the recipe but the recipe dough is a little buttery for me so the cookies were more flat and crunchy than mine usually are. Next time I think I’ll try my own favorite cookie batter and see how it goes. Just a preference thing. Trust me...there were no complaints about the awesome result of the original recipe.

Also, I wasn’t sure how much cookie dough I should use with the candy so my first batch I used too much. My cookies were flat and the caramel was a little lost. I would recommend using as little cookie dough as you can to just cover the candy—about golf ball size in all.

Try it out! I promise you won’t be disappointed.


Milky Way Salted Caramel Chocolate Chip Cookies

Ingredients:
Milky Way Simply Caramel fun-sze (I used two bags of the fun-size)
4c flour
1ts baking soda
1t salt, (sea salt preferred) and extra for dipping your candy
1 ½ c unsalted butter, melted
2c brown sugar, packed
1c granulated sugar
1TB vanilla extract
2 eggs
2 egg yolks
3c semi-sweet chocolate chips (or milk chocolate if you’re a totally sweet tooth like me)

Directions:
Sift or whisk together the flour with your salt and baking soda, set aside.  Cream together the melted butter, brown and granulated sugar.  Once incorporated, beat in the eggs, then vanilla.  After the wet ingredients are combined, add in your dry ingredients.  Mix until just combined and then add the chocolate chips, gently stir them in. 

Cut the Milky Way candies in half, dip them into sea salt to seal the open caramel end.  Take a ball of dough, just big enough to cover the half-bar, add more dough if needed.  Roll into a ball and sprinkle the top with more sea salt.


Bake at 325 degrees for 17 minutes with 12 cookies per sheet.  Let cool before transferring to a cooling rack.  


Tuesday, February 12, 2013

Banana Chocolate Chip Biscotti


My very best friend used to make me this delicious treat. Even now whenever I make this, I think of her and her fabulousness. She had the recipe on a little index card in her recipe book. I copied it some time ago and lost it in my many travels since college. It’s a Betty Crocker recipe from some old cook book but I’ve never been able to find the true reference for it (if you do, let me know!) I finally found it on some obscure website that I’ve never been able to find again. Luckily I printed it out and cherish that printed copy. Now I’m blogging it so that I’ll always know where to find it. 

I’m generally not a huge biscotti fan. Sure it’s great to dunk in coffee… but really, without the coffee I'm afraid I'll chip a tooth! This biscotti is in a whole different category. Don’t get me wrong, it’s still crunchy like biscotti should be but that little touch of banana gives it a soft and crumbly consistency that won’t break any teeth. 

Try it out! It’ll make you a lover of the crunchy cookie variety.

Banana Chocolate Chip Biscotti

Ingredients:
1 cup sugar
1 stick (1/2 cup) butter
1/2 cup mashed very ripe banana (about 1 medium)
1 teaspoon vanilla
2 eggs
3 cups all-purpose flour
3 teaspoons baking powder
1/4 teaspoon salt
1 cup miniature semisweet chocolate chips

Directions:

Preheat oven to 350 degrees. Cream together butter and sugar. Mash up your banana in a separate bowl. Add bananas, egg and vanilla to the butter and sugar mixture.  Sift (or stir) together the flour and baking powder then add to the wet ingredients. Fold in the miniature chocolate chips.

Cover a large baking sheet with parchment paper. Butter up those beautiful hands of yours. It's about to get sticky. Divide your dough in two. Create two logs that are about 3”x10”. Side by side on the pan is fine. They don’t rise a whole lot so just a few inches apart is fine. Bake for 25 minutes or until a toothpick inserted in the middle comes out clean.

Let the logs cool on the pan for 15 minutes or so. Transfer the logs to a cutting board and cut into 1 inch slices .Place the slices back on your parchment papered baking sheet. Bake for another 10-12 minutes until just slightly browned. Take them out of the oven, let them cool for 5-10 minutes until you can touch them. Flip them onto the other side and bake for another 10 minutes. Keep an eye on them this second time around to make sure they don’t get too dark.

Summon all of your willpower and let them cool completely. Cooling them will harden them up. Remember that they’re crumbly so messing with them too soon with result in a crumbly mess and ugly, broken cookies.


your buttery logs

after the first round of baking, cut into 1 inch slices

brown one side for 10-12 minutes

flip! brown the other side for 10 minutes

Enjoy!

…. but not too much. These babies are addicting.